Tuesday, December 29, 2015

The Wizard's Crystal Ball!


The Wizard with Crystal Ball (Stampinback) from I Brake for Stamps  is looking at his crystal ball and has predicted that 2016 will be a good year!

The Wizard with Crystal Ball was stamped with Tuxedo Black Memento ink (Imagine Crafts/Tsukineko) and colored with Copic markers. Buttermilk Spica Glitter and Gold Spica Glitter pens (Copic) were used to add sparkly magic dots issuing from the Wizard's fingers.

"peace, love, joy" from the Christmastime Remnants Rubs (Idea-ology) and "2016" rub-ons (Doodlebug) were applied over the crystal ball. I outclevered myself and it looked wonky, so I used my VersaMark pen (Imagine Crafts/Tsukineko) and several layers of  Polysparkle embossing powder (Ranger) over the crystal ball to make it look sparkly and dimensional.  Golden Glitz Delicata ink (Imagine Crafts/Tsukineko) was sponged around the image panel to add some festive sparkle.

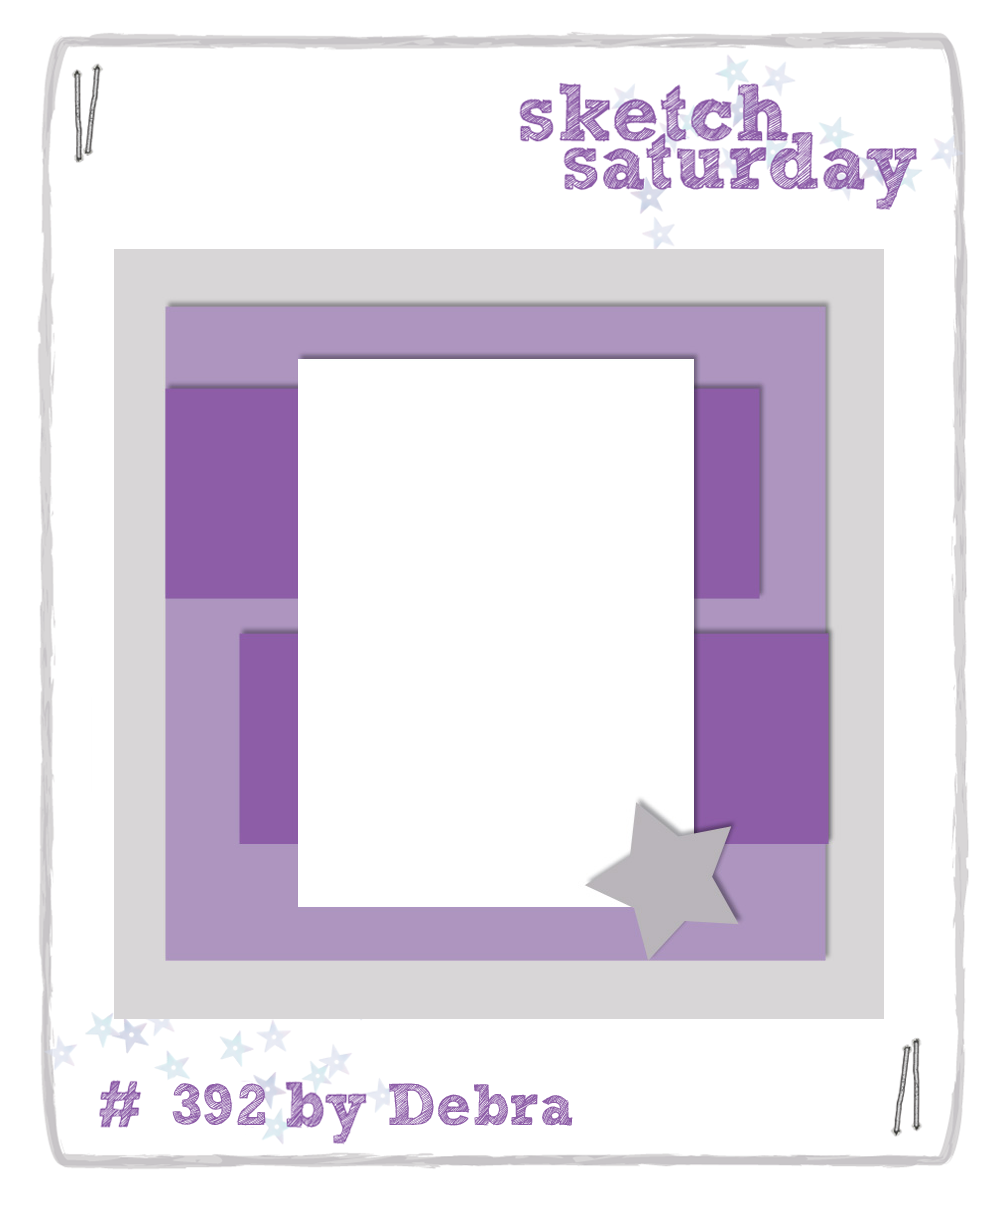
Star-patterned paper from the old and hoarded Happy Hauntings 8x8 pad (Graphic 45) was layered over ledger-patterned paper from an old So Sophie Lost and Found 6x6 pad (My Mind's Eye) according to a sketch I found at Sketch Saturday Challenge Blog. The star-patterned paper was edged with Golden Glitz Delicata ink. The ledger paper was edged with Paris Dusk Memento ink (Imagine Crafts/Tsukineko) and Golden Glitz Delicata ink.

The card front was adhered to a yellow card. A scrap of the yellow cardstock was die-cut with the star from the Blueprints Four die set (Die-namics), sponged with Golden Glitz Delicata ink, then adhered to finish the card.

Here's the sketch from the Sketch Saturday Challenge Blog so you can see how I did with it.

You really ought to go check out  IBFS's collection of Stampinback Stamps and all the other great stamps at I Brake For Stamps. Click on my badge below to be whisked over there to check out their fabulous images! Best of all, if you buy something, use this code: SAVE10KATHI  and you'll get 10% off your purchase.


Thanks for visiting today!

I shall enter this card into the following challenges:
Sketch Saturday Challenge Blog: Sketch 392
Simon Says Stamp Wednesday Challenges: Make It Sparkle

Friday, December 25, 2015

Meowy Christmas!

This Friday's challenge theme at The Outlawz Coloring Challenges  is "Anything Goes" or Christmas. Very timely, don'tcha think? My Outlawz Coloring Challenge teammates, Carla, Penny, Vannessa, and I challenge you to create a project for this challenge. Check out my teammies' blogs to see their gorgeous artwork. By the way, this is our last challenge as a team, which makes me feel a bit sad as I'll miss working with Carla and Penny.

Here's my card with Les Chats Russe (Katzelkraft).


Three of the cats from the set were stamped with Tuxedo Black Memento ink (Imagine Crafts/Tsukineko), colored with Copic markers, fussy-cut, and edged with a Black Pitt Artist pen (Fiber Castell). They were set aside while I created accessories and a background for them.

White Pearl Shimmering cardstock (Crafter's Companion) was sponged with Chipped Sapphire and Blueprint Sketch Distress ink (Ranger). The Sheet Music stencil (The Crafter's Workshop) was placed over the sponged cardstock, then Chipped Sapphire Distress ink was sponged over it, which yielded a subtle shimmery music background.

Neenah cardstock was die-cut with the Santa Hat from the Bird Crazy Things Framelits Alterations die set (Sizzix) and the Santa and Elf Hat from the Holiday Hats die set (Memory Box). They were colored with Copic markers. Slits were cut in the Santa Hats for the cats' ears. 

Black glittery vellum was die-cut with the Happy, Birthday, Merry, Christmas Small Words die set (All Occasions), the Upper Case and Lower  Case Alphabet die sets, and Santa's Sleigh die (Frantic Stamper). A scrap of the White Pearl Shimmering cardstock was die-cut with one of the circles from the Nestabilities Classic Circles die set (Spellbinders).

Black glitter Washi tape (Recollections) was placed at the base of the stenciled sponged shimmery cardstock. The three singing, hat-wearing cats from the Les Chats Russe set were adhered, and the die-cuts were added. A single red Sparkle Dot (Stampendous) was added. The cardfront was adhered to a white card and I called it done! 

Thanks for visiting today and Merry Christmas! Stay safe and have a lovely holiday!

I shall enter this card into the following challenges:

Wednesday, December 23, 2015

A Late Holiday Card Without Sentiment.

Last Friday's challenge at The Outlawz Coloring Challenges was a color challenge. My Outlawz Coloring Challenge teammates, Carla, Penny, Vannessa, and I challenge you to create a project for this challenge and there's still time to enter. Check out my teammies' blogs to see their gorgeous artwork.

Here's the color palette, courtesy of Design Seeds.

Here's my card which doesn't really match the palette at all, except maybe the grey/black, the top pink, and the bottom color (in her eyes).


The Outlawz Coloring Challenges is being sponsored this month by The East Wind Digital Stamps. I've used The Best Gift Ever for my card.

The Best Gift Ever was resized in PhotoElements and printed out onto Neenah cardstock with my laser printer. It was colored with Copic markers in colors that I mistakenly thought matched the color palette. My method is to open an online Copic chart in one window and the color palette in another window and match the colors.  Apparently I was drunk or unconscious this time. Oh well. When I was done coloring the image, I used silver gel pen on the buttons on her mittens and pink chalk pencil to add blush to her cheeks.

The patterned paper is from an old 6x6 pad by Authentique. White glitter paper was die-cut with the Twilight Snowflakes die (Memory Box) and the Alison's Ribbon Borders die (Cherry Lynn Designs). Pink cardstock was die-cut with the Double Scallop Border die (Die-namics).

I couldn't decide on a sentiment, so I left one off the card. 

BTW, I want a white kitten for Christmas, though Flash and Duchess, my geriatric cats, would not like her at all. Bother.

Thanks for visiting today!

I shall enter this card into the following challenges:


Tuesday, December 22, 2015

Well? Naughty or Nice?


Read My Lips Lucille, from the fabulous and funny Humorous Senior Collection of stamps (I Brake for Stamps) wants to know if you've been naughty or nice. She's one of Santa's secret agents and she has to report back to her boss real soon! Can't you see how impatient she is? She's practically tapping her left foot!

Lucille was stamped with Tuxedo Black Memento ink (Imagine Crafts/Tsukineko), colored with Copic markers, fussy-cut, and edged with Black Pitt Artist pen (Faber Castell).  Her glasses were colored with a Red Spica Glitter pen (Copic). The clasp of her handbag, her glasses chain, and her sweater clips were touched with gold gel pen. Her handbag, shoes, and glasses (frames and lenses) were coated with several layers of Clear Gelly Glaze pen (Sakura) to add dimension and shine.

The Naughty or Nice theme was reinforced with ledger paper from an old 6x6 pad by My Mind's Eye. The other patterned papers are from the Vintage Christmas 6x6 pad (My Mind's Eye). The patterned papers were all edged with Cornflower Blue Archival ink (Ranger).

Red cardstock was die-cut with the Naughty or Nice die (CottageCutz), Alison's Ribbon Borders die (Cherry Lynn Designs), and a Santa die set (QuicKutz). Gold metallic cardstock was die-cut with a buckle die by BossKut.

You really ought to go check out  Humorous Senior Collection of stamps and all the other great stamps at I Brake For Stamps. Click on my badge below to be whisked over there to check out their fabulous images! Best of all, if you buy something, use this code: SAVE10KATHI  and you'll get 10% off your purchase.


Thanks for visiting today!

I shall enter this card into the following challenges:
• Simon Says Stamp Wednesday Challenges: Die Crazy
Sisterhood of Snarky Stampers Challenges: XMas
Left of Center Creative Challenges: Bumper Christmas
ScrapyLand Challenges: Holidays

Sunday, December 20, 2015

Belated Birthday Card


Here's a late birthday card that I made for my nephew, who was off at school for his birthday. Being me, I took his absence at the recent family celebration as an extension, which seemed to continue to lengthen. Ah well. He's not a wee tot anymore and he knows his aunt is a flake, so the lateness of the card is not as dire. I did wish him Happy Birthday on FB and told him I was running late. Maybe that will exonerate me. Or maybe not.

This card features Stampotique's Rabbit (Janet Klein).  Rabbit was stamped with Tuxedo Black Memento ink (Imagine Crafts/Tsukineko), colored with Copic markers, fussy-cut, and edged with a Black Pitt Artist pen (Faber Castell). Rabbit's eyes, nose, buttons, and the watch were coated with several layers of Clear Gelly Glaze pen (Sakura) to add dimension and shine. A gold gel pen was added to the watch chain to make it stand out a bit more.

Gold metallic cardstock (Recollections) was die-cut with the Clock die (KaiserCraft). A circle was cut from patterned paper from an old 6x6 pad by My Mind's eye.

Patterned paper from the same 6x6 pad was cut, all the edges were sponged with Black Soot Distress ink (Ranger), and then layered. The clock die-cut was adhered to the card front and Rabbit was glued in place.

Black metallic cardstock (Recollections) was die-cut with the Missy Micro font die (Die-Versions), Wishes from the "Best Wishes" die set (Elizabeth Craft Designs), and  Birthday from the"Happy Birthday die set (Die-Versions). They were adhered to create the sentiment.

The card front was adhered to a white card and I called it done! I even mailed it!

Thanks for visiting today!

I shall enter this card into the following challenges:
Allsorts Challenges: Anything But Christmas
Simply Papercraft Challenges: Anything Goes
Crafting With An Attitude Challenges: Anything Goes
Simon Says Stamp Wednesday Challenges: Die Crazy

Thursday, December 17, 2015

Happy Chanucat! A Belated Card

Here's yet another project which shows you how my mind works. Or doesn't. I'll leave decision up to you!

This card holds a check and will be mailed to my nephew's home, where it will await his triumphant return from his first semester in college. I did mean to send it to him while he was actually at the college, but the best plans of mice and Kathi sometimes are thwarted by mundane stuff.

So, without more twaddle, here's my card which features two SCACD digital stamps, namely Kathi's Menorah Unlit and Kitten Stack. If you are outside of the U.S., you can find these and the other fantastic SCACD digis here.


I opened Kathi's Menorah Unlit in PhotoElements and added candles to eight of the the candle-holders. If you want to know how to add candles to Kathi's Menorah Unlit, I wrote a tutorial last year, brilliantly titled Kathi's Menorah - A Tutorial.

I erased the flame from the candle on the furthest right, which would be the last candle lit, as they are lit from left to right.

Next I opened Kitten Stack, erased the butterfly that comes with the image, then added a candle to the topmost kitten's paw. I had to rotate the Kitten Stack a bit to make it look as though the kitten were holding the candle because that would really happen in real life. Then I moved the rotated Kitten Stack over so that the flame from the kitten's candle was lighting the last candle. I saved the scene and then reduced it and printed it out onto cardstock using my laser printer.

The scene of Kitten Stack and Kathi's Menorah Unlit was colored with Copic markers. You will note that I made one cat a calico and the other a marmalade tabby. Kitten Stack is so much fun to customize! When I was done, I edged the image panel with Hickory Smoke Distress ink (Ranger).

The patterned paper, from some 6x6 pads by My Mind's Eye, was chosen to match the colored Kitten Stack. The striped sheet, chosen to bring all the colors together, was die-cut with one of the dies from the Stax Jumbo Fishtail Banner (Die-namics). All edges of the patterned paper were sponged with Hickory Smoke Distress ink.

Very old Doodlebug RubOns were used to add the ever-so-clever sentiment to a strip of patterned paper.

I should mention that we have two cats who help us celebrate Chanukah. They watch the entire candle-lighting ceremony each and every night, then keep guard over the menorah. Each year, one of them manages to singe fur or a whisker by getting a bit too close to the open flame. You do know what they say about cats and curiosity, don't you? And the bit about the nine lives, that's for real too.

Thanks for visiting today.
 
I shall enter this card into the following challenges:
Scrapy Land Challenges: Holidays
Simon Says Stamp Wednesday Challenges: Die Crazy
Show Us Your Pussies: Krimbo Kitties

Tuesday, December 15, 2015

Christmas Wishes


Here's my latest holiday card featuring Good Morning Sunshine from the fabulous and funny Humorous Senior Collection of stamps (I Brake for Stamps). I think Good Morning Sunshine is incredibly versatile and can see myself using her for all sorts of projects from birthday to congratulations to snarky cards.

Good Morning Sunshine was stamped with Tuxedo Black Memento ink (Imagine Crafts/Tsukineko) onto Neenah cardstock, colored with Copic markers, fussy-cut, and edged with a Black Pitt Artist pen (Faber Castell). Good Morning Sunshine was also stamped onto a patterned paper from the Christmas Wish 6x6 pad (My Mind's Eye) because I wanted to paper-piece her bathrobe. The patterned paper was colored and shaded with Copic markers, fussy-cut, edged with the same black pen. The robe was then adhered over its counterpart on the main image. A touch of pink chalk pencil (Derwent) was used to add blush to her cheeks.

The patterned papers, from the 6x6 pad, were layered according to Sketch #391 from Sketch Saturday Challenges. All edges were sponged with Black Soot Distress ink (Ranger).

One of the dies from the Twilight Snowflakes die set(Memory Box) was used to die-cut from white cardstock, which was then adhered in place according to the sketch. Sentiments were added using Christmastime Remnant Rubs (Idea-ology) to finish the card.

Here's the sketch so you can see how I did with it!

You really ought to go check out  Humorous Senior Collection of stamps and all the other great stamps at I Brake For Stamps. Click on my badge below to be whisked over there to check out their fabulous images! Best of all, if you buy something, use this code: SAVE10KATHI  and you'll get 10% off your purchase.


I shall enter this card into the following challenges:
Sisterhood of Snarky Stampers Challenges: X is for Xmas
Sketch Saturday Challenges: Week 391
Dies R Us Challenges: Winter (Use Snowflakes)
Lost Coast Portal to Creativity Challenges: Christmas

Wednesday, December 9, 2015

Alphabets

Claudine Criner is the hostess at Stampotique Designers Challenge Blog and her theme is "Alphabets". Here's what she had to say about her challenge.
 "Use your alphabet stamps or images to create a letter of the alphabet."
If you'd like the chance to win your choice of $30 worth of Stampotique stamps, you should play along with this challenge. Visit Stampotique Designers Challenge blog and be sure to read the rules so that you'll have the chance to win that great prize!!!  Remember to check to see the deadline for all of this month's Stampotique Designers Challenges!


Here's my card with Eric (Daniel Torrente) and the paint tube from Containers Cubed #2 (Amy Wilson Wellenstein).


With the help of my Stampa-Ma-Jig stamp positioner (EK Success), Eric was stamped twice with Tuxedo Black Memento ink (Imagine Crafts/Tsukineko) and colored with Copic markers. The paint tube from Containers Cubed #2 was stamped with Angel Pink Memento ink between them to become the cross bar of an "H", but the impression was too faint, so I restamped it again, colored it with Copic markers, and fussy-cut it. The "H" formed by the Eric and the paint tube from Containers Cubed #2 was fussy-cut and edged with a Black Pitt Artist pen (Faber Castell). The paint tube was adhered in place over its counterpart. They were set aside while I created a background for them.

Retrospectively, it would have been much easier to stamp Eric twice, color them, and fussy-cut them. Live and learn.

White cardstock was die-cut with the Arched Window die (Taylored Expressions) and the house-patterned paper from the Eskimo Kisses 6x6 pad (Basic Grey) was put behind the windows. Other papers from the same pad were used for the wall and floor. 

The Alphabet Plain Upper Case die (Impression Obsession) was used to die-cut red cardstock for the rest of the letters in the "Happy Holidays".

The layers were assembled, the Erics added, and the balance of the sentiment was adhered. The card front was adhered to a red card base and I called it done!

Thanks for visiting today!

I shall enter this card into the following challenges:
Country View Challenges: Make a Scene
Simon Says Stamp Monday Challenges: Holly Jolly Stamping

Tuesday, December 8, 2015

Santa in The Netherlands


Once again, I was feeling like creating a scenic card so I pulled out my Cats and Buildings stamps (Stampinback)  which I got at I Brake for Stamps.  Cats and Buildings is a half sheet that has two different scenes of Dutch buildings (Amsterdam?) and a great cats stamp.

I recently used one of the two Dutch buildings stamps from the Cats and Buildings stamps half sheet, so it was time to use the other one. I used Tuxedo Black Memento ink (Imagine Crafts/Tsukineko) onto Solar Crest White cardstock (Neenah) and onto Eclipse Tape (Judikins). The Eclipse Tape version was fussy-cut and set aside while I colored the other impression with Copic markers. After coloring the buildings, the Eclipse Tape version was placed onto its counterpart while I colored a night sky with B63, B66, and B69 Copic markers. With the mask still in place, I dipped a toothbrush into some Titanium White Media Fluid Acrylic paint (DecoArt), then sprayed some white stars over the sky. The mask was removed and a sidewalk and canal were added with Copic markers. A touch of white gel pen (Sakura) was used to add some white caps to the water.

Black Glittery cardstock was die-cut with Santa's Sleigh die (Frantic Stamper). White cardstock was die-cut with one of the dies from the Clouds die set (Joy Crafts) and one of the dies from the Circles Nestabilities die sets (Spellbinders). The Clouds die-cuts were detailed with C01, C0, and C00 Copic markers. The circle (moon) was detailed with the Clear Stardust Glitter pen (Sakura). The scene was assembled, then the image panel was die-cut with one of the dies from the Rectangles die set (WeRMemory Keepers).

The image panel was adhered to a piece of patterned paper from an old Echo Park 6x6 pad. The sentiment was die-cut from the excess colored cardstock using a Merry Christmas die (All Occasions). Patterned paper from the same pad was die-cut with the Stitched Strip die from the Blueprints Two die set (Die-namics) and one of the dies from the Fancy Framed Tags die sets (Spellbinders). Stardust Glitter Gel pen was used to add some sparkle to both of them.

The card was assembled, some black photo corners (3L) were added, and I called the card done!

You really ought to go check out IBFS's collection of Stampinback stamps and all the other great stamps at I Brake For Stamps. Click on my badge below to be whisked over there to check out their fabulous images! Best of all, if you buy something, use this code: SAVE10KATHI  and you'll get 10% off your purchase.

Thanks for visiting today!

I shall enter this card into the following challenges:


Monday, December 7, 2015

Sequins or Where My Mind Takes Me

Valerie Wilson is the hostess at Stampotique Designers Challenge Blog and her theme is "Sequins". Here's what she had to say about her challenge. 

 "Let's see where your creativity takes you. Sequins come in every size, shape and color and can be used in so many ways. Where will they end up in your project?"
 If you'd like the chance to win your choice of $30 worth of Stampotique stamps, you should play along with this challenge. Visit Stampotique Designers Challenge blog and be sure to read the rules so that you'll have the chance to win that great prize!!!  Remember to check to see the deadline for all of this month's Stampotique Designers Challenges!

Here's my tag with Stampotique's Karen (Daniel Torrente).


I will admit I was somewhat stumped with this challenge. Whereas I have lots of sequins in my stash, some kept somewhere safe, I rarely use them. In fact, most were still in sealed packets. After a bit of thinking, this is what came to mind. 

Karen was stamped with Tuxedo Black Memento ink (Imagine Crafts/Tsukineko) and colored with Copic markers. When I was done, I added some flat and shaped sequins to the image, which makes Karen's outfit a bit less wholesome. 

A strip of red-liner tape was added below Karen's feet and a few sequins were added there. Then some Prisma Glitter was shaken on to fill in the space around the sequins. The image panel was matted with blue glitter paper from the Glitzy Glitter stack (DCWV).

Matching star-patterned paper from the Baby Boy Collection (Basic Grey) was edged with Distress ink (Ranger). Ancient rub-ons were used to add the sentiment, then matted on blue cardstock that had been punched with Ticket and Tag Duo Corner punch (Tonic). A variety of star and round faceted sequins were added to the tag, which was finished with some transparent ribbon.

Thanks for visiting today! 

I shall enter this tag into the following challenges:
Glitter 'N' Sparkle Challenges: Anything Goes
Stamping Sensations Challenges: Anything Goes with a Stamp and Ribbon 
 

Friday, December 4, 2015

White Christmas/Let It Snow

This week's the challenge at The Outlawz Coloring Challenges is "Let It Snow". My Outlawz Coloring Challenge teammates, Carla, Penny, Vannessa, and I challenge you to create a project for this challenge. You should check out their blogs to see their gorgeous artwork. 

Here's my card with Foxy, one of the fabulous new digital stamps at SCACD. If you're overseas, you can purchase Foxy and the SCACD's other digi stamps HERE.


Foxy was resized in PhotoElements, printed out onto Solar Crest White cardstock (Neenah) using my laser printer, colored with WG Copic markers, fussy-cut, then edged with a dark WG marker. I must note that Foxy has a flower in his mouth in the digital image, which I omitted when I fussy-cut the image. I also opted to make him into an Arctic Fox instead of a Red Fox.

White cardstock was die-cut with three of the dies from the Stitched Scene Builder Edgers die set (Frantic Stamper). These die-cuts were layered atop a piece of patterned paper from the Figgy Pudding 6x6 pad (Basic Grey), the sheet was cut down, then edged with Broken China Distress ink (Ranger). This was matted with a sheet of grey patterned paper from the same pad. The leftover strip was die-cut with one of the dies from the Stitched Speech Bubble Edges, edged with Broken China Distress ink, then adhered to the top of the panel. The sentiment and some snowflakes from the Christmastime Remnant Rubs (Idea-ology) were added to the Stitched Speech Bubble Edge. 

Clear Stardust Glitter pen (Sakura) was used to trace between the stitches on the top and bottom die-cuts. Foxy was added to the scene I created, then the image panel was adhered to a white card.

Thanks for visiting today!

I shall enter this card into the following challenges:
Scrapy Land Challenges: Anything Goes
Simon Says Stamp Wednesday Challenges: Let It Snow
Crafty Sentiments Designs Challenges: Winter
Tuesday Throwdown Challenges: Cute and Cuddly

Tuesday, December 1, 2015

Gift Card Pillow Box!


It's December and the beginning of that crazy time of year, known chez Kathi as ChrisBirthdayKah. As such, I'll be scrambling for various ways to give gift cards and other small gifts (jewelry, candy, tickets). This Pillow Box features Bunnie/ATC Diva. and will be used for a Dunkin' Donuts gift card.  Bunnie is one of a bunch of fabulous ATC Divas rubber stamps by Rubber Romance that are available at I Brake for Stamps.

Bunnie was stamped with Tuxedo Black Memento ink (Tsukineko/Imagine Crafts) and colored with Copic markers to match a sheet of plaid paper from the Eskimo Kisses 6x6 pad (Basic Grey). After coloring the background, the image panel was die-cut with a die from the Rectangles set of dies (QuicKutz/WeR). A die from the Long Scalloped Rectangles Nestabilities die set (Spellbinders) was used to die-cut a piece of patterned paper from the Eskimo Kisses 6x6 pad (Bsic Grey).

Green cardstock was die-cut with the Pillow Box Alterations die (Sizzix). Patterned paper from the same pad and scraps from red patterned paper was die-cut with the Poinsettia die (QuicKutz) then shaped with tools. The flowers were stacked with the petals offset, then attached with gold brads. These were placed on the top of the pillow box. A piece of patterned paper from the Eskimo Kisses pad was folded, then die-cut with one of the dies from the Heart Nestabilities die set (Spellbinders). A smaller Scalloped Heart Nestabilities die (Spellbinders) was used to die-cut another scrap from the same pad. The die-cuts were edged with Fired Brick and Spun Sugar Distress ink (Ranger). A scrap of leftover green cardstock was die-cut with the "4" from the Vintage Numbers die (Top Dog Dies). and the "U" from the Vintage Alphabet die (Top Dog Dies).

I assembled the project, now all I need to do is find the Dunkin' Donuts card which is hidden in a safe place a Black Hole.

You really ought to go check out Bunnie, IBFS's collection of Rubber Romance's ATC Divas, and all the other great stamps at I Brake For Stamps. Click on my badge below to be whisked over there to check out their fabulous images! Best of all, if you buy something, use this code: SAVE10KATHI  and you'll get 10% off your purchase.


Thanks for visiting today!

I shall enter this project into the following challenges:

Sunday, November 29, 2015

Merry Christmas!

Well it's after Thanksgiving and the neighbors are all putting up their holiday decorations, so I guess I'm getting into the holiday spirit too and made another card for Nellie van Leeuwen's "Quick and Easy Christmas Card" challenge over at Stampotique Designers Challenge Blog.

If you'd like the chance to win your choice of $30 worth of Stampotique stamps, you should play along with this challenge. Visit Stampotique Designers Challenge blog and be sure to read the rules so that you'll have the chance to win that great prize!!!  Remember to check to see the deadline for all of this month's Stampotique Designers Challenges!

Here's the card with Cocoa Bird (Kira Nichols)


Cocoa Bird was stamped with Tuxedo Black Memento ink (Imagine Crafts/Tsukineko) onto Solar Crest White cardstock (Neenah). The image was colored with Copic markers, fussy-cut, then edged with a Black Pitt Artist pen (Faber Castell). Cocoa Bird's eyes, beak, talons, and the coffee lid were coated with several layers of Clear Gelly Glaze pen. Cocoa Bird was set aside while I created a background for him.

A die from an old Sizzlets set (Sizzix) was used to die-cut patterned paper. The interior of the cup and the saucer were colored with Copic marker. Red and white cardstock were die-cut with an old Santa hat (QuicKutz).

Blue cardstock took a ride through the Big Kick (Sizzix) inside the On the Go Alterations embossing folder (Sizzix). The embossed panel was trimmed, matted with green cardstock, then adhered to a sheet of patterned paper from the Eskimo Kisses 6x6 pad (Basic Grey). This was edged with Distress ink, then mounted onto a white card. 

The cup and saucer were adhered to the card front, Cocoa Bird was adhered, and the Santa Hat was added to his head.

Patterned paper from the same 6x6 pad was die-cut with one of the dies from the Chat Bubbles die set (Penny Black) and the sentiment, from the Christmastime Remnant Rubs sheet (Idea-ology), was added to finish the card.

Thanks for visiting today!

I shall enter this card into the following challenges:
Crafty Hazelnuts Christmastime Challenges: Use Dies or Punches
Fab 'n' Funky Challenges: Christmas
Simon Says Stamp Wednesday Challenges: Anything Goes

Saturday, November 28, 2015

A Very Addams Christmas card!

This week's the challenge at The Outlawz Coloring Challenges is "Anything Goes/Christmas". My Outlawz Coloring Challenge teammates, Carla, Penny, Vannessa, and I challenge you to create a project for this challenge. You should check out their blogs to see their gorgeous artwork. 
Our November sponsor at The Outlawz Coloring Challenges is Vera Lane Studios, who is offering our lucky winner the choice of one of four sets used by our design team during November.  Play along with our challenge and share your artwork with us for your chance to win!


Here's my card using various digi stamps from Vera Lane Studios. I've used Uncle Fester and Thing from the Fester Frump set, Wednesday from the Wednesday and Puggsley set, and the Santa hat from the Boutique Hats set.

PhotoElements was used create this scene. The Santa hat from the Boutique Hats set. was triplicated, resized, and placed atop Wednesday's head,  Uncle Fester's head, and a reduced Thing. When I was happy with the scene, I reduced it and printed it onto Solar Crest White cardstock (Neenah) using my laser printer. 

The image was colored with Copic markers, fussy-cut, then edged with my Black Pitt Artist pen (Faber Castell). Pink Pastel pencil (Derwent) was used to add some blush to both Wednesday's and Uncle Fester's cheeks. White Gel pen (Sakura) was added to Wednesday's and Uncle Fester's buttons. Several layers of Clear Gelly Glaze pen (Sakura) were built up onto Wednesday's and Uncle Fester's buttons and Wednesday's shoes. 

Very old 6x6 Memory Box patterned paper was edged with Aged Mahogany Distress ink, then layered to create the card front.

A tiny skull punch (Studio G) was used to punch white cardstock. The skulls were colored with Copic markers, black punched circles were added behind their eye sockets, then the backs of the skulls were slightly rounded with a shaping tool. Silver thread was tied around Wednesday's hand and the skulls were popped up onto dimensional foam adhesive on the thread.

An Christmas lights die (QuicKutz) was used to die-cut white cardstock. One light was then colored with Copic markers , a Silver Leafing pen (Krylon), coated with a layer of Stardust Glitter pen, then several layers of Clear Gelly Glaze pen were added to create dimension and shine. A slit was cut in Uncle Fester's mouth and the light bulb was added.

Chat Bubbles dies (Penny Black) were used to die-cut patterned cardstock. Two of the bubbles were then edged with Aged Mahogany Distress ink. The sentiments "Jingle Bells" and "Glitter and Sparkle" from Christmastime Remnant Rubs (Idea-ology) were added to the bubbles. "Merry Christmas", a silver foil sticker, was added to the lower right to add a third silvery element to finish the card.

Thanks for visiting today!

I shall enter this card into the following challenges:
Crafty Hazelnuts Christmastime Challenges: Use Dies or Punches
Fab 'n' Funky Challenges: Christmas
Simon Says Stamp Wednesday Challenges: Anything Goes
Papertake Weekly Challenges: Take Your Pick (Red & Green)

Wednesday, November 25, 2015

Quick and Easy Holiday Cards!

Nellie van Leeuwen is the hostess at Stampotique Designers Challenge Blog and her theme is "Quick and Easy Christmas Cards". Here's what she had to say about her challenge.
"It's that time of the year when you know you should have started earlier with making
your Christmas cards. So now you have to come up with some quick and easy (yet stunning of course :-D ) Christmas cards."
If you'd like the chance to win your choice of $30 worth of Stampotique stamps, you should play along with this challenge. Visit Stampotique Designers Challenge blog and be sure to read the rules so that you'll have the chance to win that great prize!!!  Remember to check to see the deadline for all of this month's Stampotique Designers Challenges!

Here's my card with Stampotique's  Chilly (Jo Capper-Sandon).

Chilly was stamped with Tuxedo Black Memento ink (Tsukineko/Imagine Craft) and colored with Copic markers. White Gel pen (Sakura) was used to add snow to Chilly's arms and hat. Red Spica Glitter pen (Copic) was used to add some glitter to Chilly's buttons. Clear Gelly Glaze pen (Sakura) was used to add some dimension and gloss to Chilly's carrot nose and his glittery buttons. Clear Stardust Glitter pen (Sakura) was used to add some glittery snowflakes to the background.

The patterned papers are all from the Making Merry 6x6 pad (Little Yellow Bicycle) and were layered according to Sketch #27 from Your Next Sketch Challenge. I like to use sketches when I'm feeling a bit rushed. Since this challenge was "Quick and Easy", a sketch was clearly the way to go! All patterned paper layers were die-cut with the dies from the A2 Card Creator die set (Spellbinders) and edged with Hickory Smoke Distress ink (Ranger). Christmastime Remnant Rubs (Tim Holtz/Idea-ology) provided the sentiment.

Here's the sketch so you can see how I did (other than flipping it).


Thanks for visiting today!

I shall enter this card into the following challenges:
Copic Marker Europe Challenges: Christmas
Allsorts Challenges: Three or More Die-cuts
Your Next Stamp Sketch and Color Challenges: Sketch #27 
Always Playing with Paper Challenges: Christmas 
Come and Get it Challenges: Snowmen

Tuesday, November 24, 2015

Thank You!


It's always a good idea to have lots of Thank You cards on hand, especially as we approach the holiday season. The best thing about Thank You cards is that they can have almost any image on them!

I was in the mood to color scenery, so I got out my Cats and Buildings stamps (Stampinback)  which I got at I Brake for Stamps.  Cats and Buildings is a half sheet that has two different scenes of Dutch buildings (Amsterdam?) and a great cats stamp, which I love and adore.

I stamped one of the two Dutch Buildings from the half sheet onto Solar Crest White cardstock (Neenah) and colored it with Copic markers, after looking up Amsterdam architecture on Google to check if I remembered the colors accurately. After all, it's almost thirty years since I was last in Amsterdam. I was three when I went to stay in Holland for a month to visit my husband, who was doing a short stint there. After coloring the buildings, I added some Clear Spica Glitter pen (Copic) to the windows and glass doors to make them sparkle. I also added some to the strettlight and a few elements of the buildings.

The sky, pavement, and canal were added with Copic markers with a touch of white gel pen (Sakura) to add some white caps to the water.

Since the scene is rather busy, I decided to keep the design CAS. I matted the scene on Kraft cardstock, then added it to a piece of patterned paper from the Maritime 8x8 pad (7 Gypsies). I die-cut kraft cardstock using old QuicKutz dies, then added the sentiment to the label using a equally old rub-on, also from QuicKutz. Jute twine was used to string the sentiment and some staples from my Mini Attacher were used to secure it all.

You really ought to go check out IBFS's collection of Stampinback stamps and all the other great stamps at I Brake For Stamps. Click on my badge below to be whisked over there to check out their fabulous images! Best of all, if you buy something, use this code: SAVE10KATHI  and you'll get 10% off your purchase.

Thanks for visiting today!

I shall enter this card into the following challenges:

Saturday, November 21, 2015

Thank You!

This week's the challenge at The Outlawz Coloring Challenges is "Thank You". My Outlawz Coloring Challenge teammates, Carla, Penny, Vannessa, and I challenge you to create a project for this challenge. You should check out their blogs to see their gorgeous artwork. 

Our November sponsor at The Outlawz Coloring Challenges is Vera Lane Studios, who is offering our lucky winner the choice of one of four sets used by our design team during November.  Play along with our challenge and share your artwork with us for your chance to win!


Le Petite Artiste was resized in Photo Elements, printed onto Solar Crest White cardstock (Neenah) with my laser printer, colored with Copic markers, fussy-cut, and edged with Black Artist Pitt pen (Faber Castell). Chalk pencils (Derwent) were used to add a touch of blush to her cheeks and shading to her face. She was set aside, out of paint's way while I created the rest of the card.

A mountain scene was painted onto 140 lb. Mixed Media cardstock (Strathmore) with Cerulean Blue, Titanium White, Viridian Green Hue, Pthalo Green-Blue, Pthalo Green-Yellow, and Green Gold MFA paint (DecoArt). I started to use a stencil with a paint pen to add the sentiment, but that wasn't working, so I free-handed "Thank You" with Primary Yellow MFA paint.

The painting needed a setting, so I created a studio with a scrap of patterned paper, a thin strip of white cardstock, and Copic markers. But then the project told me that the studio needed some lighting, so I die-cut white cardstock with the Large Madison Window die (Poppy Stamps). The two windows were placed on the back of the patterned paper and the apertures were marked, then cut out of the patterned paper. The windows were adhered to the front of the patterned paper over the aperture. The windows told me that they needed glass, so a transparency was adhered to the back of the cardstock behind the windows. The windows then told me they needed a scene, so I quickly painted a mountain scene with the MFA paints listed above, let it dry, cut it in half, and adhered it behind the transparency in the opening of the window. The windows and the studio were now happy.

Le Petite Artiste loved her studio and her inspirational view, but told me that I had forgotten an easel.  I cobbled together an easel using wood-patterned paper from a 6x6 pad (My Mind's Eye), which was die-cut with one of the dies from the Rectangle Nestabilities die set (Spellbinders), and some strips of the wood-patterned paper. The easel looked too pristine, so I dripped some more paint onto it, then wiped it off with my finger. 

The easel, Le Petite Artiste's painting, and Le Petite Artiste were adhered to the card front, and then mounted to a white card.

Thanks for visiting today.

I shall enter this card into the following challenges:
Fussy and Fancy Challenges: Thankful 
Chalk N Stock Challenges: Anything Goes 
Crafty Creations Challenges: Give Thanks 
Simon Says Stamp Monday Challenges: Thanks/Thanksgiving

Wednesday, November 18, 2015

At The Movies

Corrie Herriman is the hostess at Stampotique Designers Challenge Blog and her theme is At The Movies. Here's what she had to say about her challenge.
"Make something this week inspired by the movies or a move star and as always, have fun!!!!"
If you'd like the chance to win your choice of $30 worth of Stampotique stamps, you should play along with this challenge. Visit Stampotique Designers Challenge blog and be sure to read the rules so that you'll have the chance to win that great prize!!!  Remember to check to see the deadline for all of this month's Stampotique Designers Challenges!

Here's my card featuring Toby (Daniel Torrente) and a hat from Hat Cube (Daniel Torrente).


Toby and the bowlerish hat from Hat Cube were stamped with Tuxedo Black Memento ink (Tsukineko/Imagine Crafts) onto 140 lb. Mixed Media cardstock (Strathmore), colored with Copic markers, fussy-cut, then edged with a Black Pitt pen (Faber Castell). A mustache and some additional hair were drawn onto Toby, the bowlerish hat was adhered, and a thin piece of cardstock was cut, colored with Copics, then adhered to Toby's hand to complete  Toby's transformation to Charlie Chaplin. Toby/Charlie was set aside while I worked on the background for him.
 
Cerulean Blue Media Fluid Acrylic (MFA) paint (DecoArt) was sponged over onto a piece of 140 lb. Mixed Media cardstock. Ultramarine Blue, Cobalt Blue Hue, Pthalo Blue, and Prussian Blue Hue MFA paints were randomly sponged over top. Diarylide Yellow, Quinacridone Red, and Titanium White MFA paints were stippled on with a Rough Stippling Tool (Momenta/Art C).  This was allowed to thoroughly dry.

When it was dry, my Old Film Mixed Media stencil (Andy Skinner/DecoArt) was taped to the cardstock with Washi tape and the top two designs of the stencil were covered. Carbon Black MFA paint was sponged over the Charlie Chaplin filmstrip design. The stencil was lifted and positioned so that the number strip was at the top edge of the cardstock. Again, the stencil was taped down, the other designs were covered, and Carbon Black MFA paint was sponged over the numbers. The stencil was lifted and washed.

The sentiment was die-cut from white cardstock using the Typewriter Uppercase and Typewriter Lowercase Font dies (Impression Obsession). I had to use my old Mini Katie font (QuicKutz) for the apostrophes and for the exclamation point. 

The painted, stenciled cardstock was trimmed to size, the sentiment was added, and Toby/Charlie was adhered. The card front was adhered to a 6x6 black card and I called it done!

Thanks for visiting today!

I shall enter this card into the following challenges:
Coloring in Scrapland Challenges: Inspired by a Book or a Movie
Country View Challenges: The Colour Blue (Mine's mostly blue!)
Crafts Galore Encore Challenges: Use a Stamp or Digi